HTC One factory reset
Why should I perform a factory reset?
A factory reset is the quickest way to wipe your device clean and start afresh. In many cases, it solves any major issue you may be experiencing as a result of bad tweaks and app installations. This is especially true for those of you who root your devices for battery, performance, and UI optimizations. One wrong move and your device may constantly crash, reset randomly, or worse – get stuck on reboot.
Performing a factory reset is also advised for those planning to install a custom ROM or update your firmware to the latest available version. You can think of it as a prepper that will ensure that the spanking new firmware you just downloaded will install properly.
Sometimes, even though you never did anything to your Android phone or tablet, it starts acting up. Most people would immediately think that it has something to do with the age of their device or its hardware. Usually however, it’s a software or memory problem. A factory reset will reset the device to its original settings and with the right options, wipe the phone memory clean.
Requirements for performing a factory reset
1. At least 60% of battery life on your device.
2. If possible, a backup of your contacts and all files (photos, videos, music, and others) in your phone and SD memory.
How to perform a factory reset on your Android phone or tablet
(Non-rooted and rooted devices)
Step 1: Go to Settings > Backup & Restore/Reset
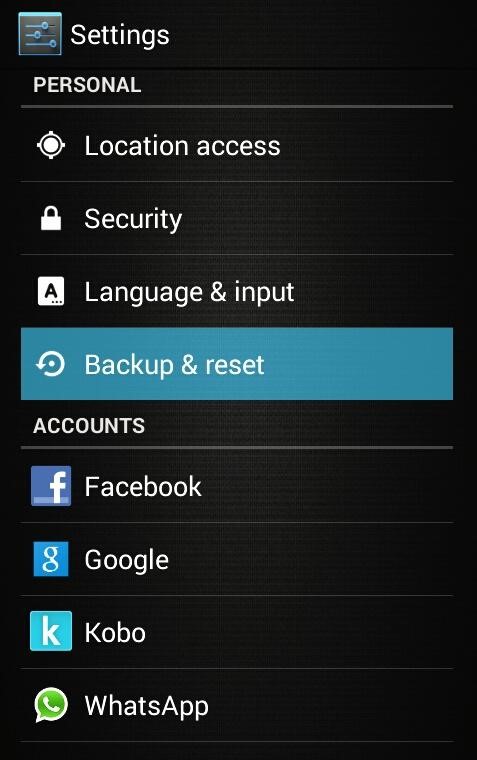
Android backup and reset
Step 2: (Optional) Click one or all of the following depending on your personal preference.
“Back up my data” backs up your app data, Wi-Fi passwords, and other settings to your Google account. Requires internet access.
“Automatic restore” restores backed up settings and data to your phone after performing a factory reset. It requires internet access and a logged-in Google account.
“Back up account” is an option for devices running Android 4.2 Jelly Bean and higher. It lets you choose which Google account you would like your data and settings to be backed up.
Step 3: Select Factory Data Reset
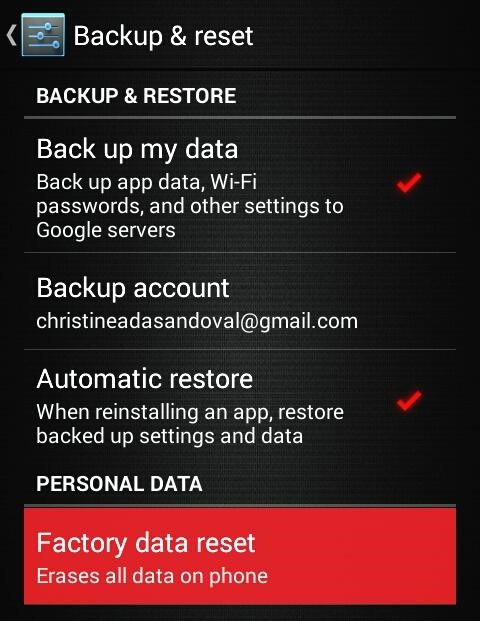
Android factory data reset
Wait for your device to reboot.
How to perform a factory reset on your Android phone or tablet (Rooted devices only)
Step 1: Go to Recovery Mode.
Note: The method for going to Recovery Mode varies across devices. Find out how to do it with your phone or tablet by doing some research.
Tips:
1. Recovery Manager is a free app that can take you to Recovery Mode with the single click of a button. It works on my Samsung Galaxy S2 so you can give it a try. It runs on Android 2.3 Gingerbread and higher, and requires a SuperUser or SU permission.
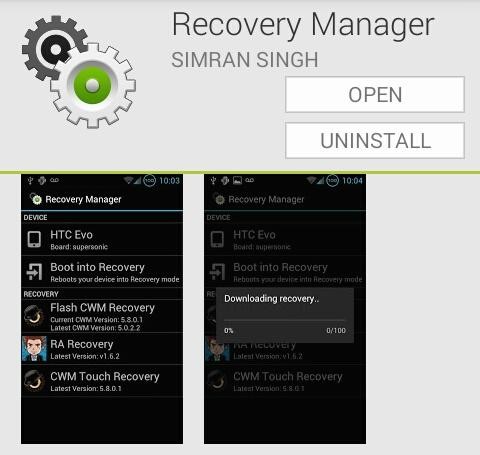
Android Recovery Manager app
2. Some custom firmwares let you switch to Recovery Mode from the Power options. Simply long-press on the power button, select Reboot > Recovery and press “Reboot”. This will take you to recovery mode.
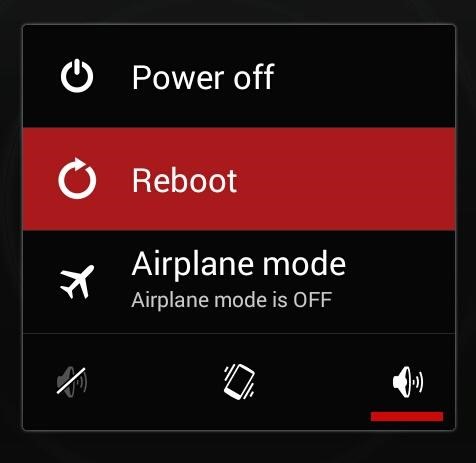
Android Recovery Mode
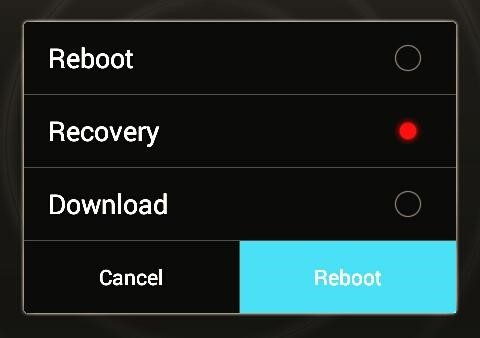
Android Recovery Mode reboot
Warning
DO NOT install ROM Manager and use it for downloading and installing recovery on your device. Based on my experience, it creates two recovery modes: the recovery that came pre-installed with your custom firmware and the ROM Manager recovery. Unless you’re experienced, this will likely confuse you and create problems later on. It’s best that you stay away from it, or limit its use to other features.
Step 2: (Optional) Perform a Nandroid backup.
During Recovery Mode, go to Backup and Restore > Backup.
This will backup your current software, device settings, and data, just in case you want to revert to the current state of your phone.
Step 3: Select “wipe data/factory reset”
Wait for your device to reboot.
Summary:
Doing a factory reset of your Android device is easy as pie. And in no time, you can even do it with your eyes closed! Seriously though. Don’t do that. If your phone issues do not get resolved and start showing problems within a few minutes or hours after a factory reset, consider switching firmwares or updating your firmware version.
Happy Recovering!


